
코딩하는 문과생
[Web] 1. 환경설정 본문
[Preview]

- 환경설정
[Tomcat 설치]
Apache Tomcat® - Welcome!
The Apache Tomcat® software is an open source implementation of the Java Servlet, JavaServer Pages, Java Expression Language and Java WebSocket technologies. The Java Servlet, JavaServer Pages, Java Expression Language and Java WebSocket specifications are
tomcat.apache.org
tomcat 8 버전 선택하고 64-bit Windows zip파일 다운받아서 C:// 아래에 설치
[이클립스 환경설정]
-
elipse -> window -> preference -> server탭 -> runtime environment -> Add -> apache 8.5선택 -> apache 설치경로 선택 -> apply
-
server탭 클릭 -> tomcat 8.5 추가
-
tomcat 더블클릭 -> 포트번호 변경 8088
-
우클릭 -> start-> 방화벽 열고-> 콘솔창 확인
[프로젝트 생성]
1. 우클릭-> new->Dynamic Web Project-> 이름:incWEB, next,next한 후 Content directory를 webapp으로 수정, 체크박스 체크
//이러한 폴더만 tomcat에 올릴 수 있다.
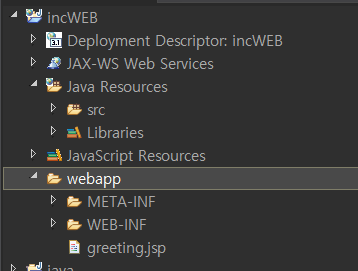
- webapp: web의 루트파일들이 들어간다. jsp나 이미지 등이 들어간다.
- src: 자바 파일, servlet 파일 저장
- lib: 3자가 제공하는 라이브러리
- web.xml: 해당 프로젝트의 설정을 담고 있다. 서버가 start 될때 먼저 실행되는 파일
2. 프로젝트 우클릭->properties-> java build path ->source-> browse... -> WEB-INF아래에 classes생성->OK
//빌드된 내용들이 여기에 저장된다. 그러나 project manager에는 따로 표시되지 않는다.
3. 기존 build 폴더 삭제
4. 프로젝트를 톰캣 서버에 올림: server 탭, tomcat 우클릭-> add and remove -> incWEB add 후 finish-> restart
5. 인코딩 변경: preference -> web-> jspfile-> utf-8로 변경
[jsp파일 생성]
- webapp우클릭->jsp file 선택-> greeting.jsp로 생성
<%@ page language="java" contentType="text/html; charset=UTF-8"
    pageEncoding="UTF-8"%>
<!DOCTYPE html>
<html>
<head>
<meta charset="UTF-8">
<title>Insert title here</title>
</head>
<body>
	<div align="center">안녕하세요, 반갑습니다.</div>
</body>
</html>
[브라우저가 서버에 요청]
http://ip:8088/incWEB/greeting.jsp
http://127.0.0.1:8088/incWEB/greeting.jsp

1. 80으로 포트번호 변경
2. module에 /incWEB을 /로 변경후 restart
http://127.0.0.1/greeting.jsp로 접근가능, 그러나 우리는 기존 방식대로 진행
- Servlet 라이프 사이클
[Servlet 파일 생성]
src우클릭 -> new, servlet클릭
- package: ctrl
- name: GreetingServlet
(+) url mapping부분을 greeting.do로 변경
(+) 생성자는 생략, init, destroy, doGet, doPost만 체크

[Request & Response 방식]
- GET방식: http://127.0.0.1:8088/incWEB/greeting.do?key=value&key=value
- POST방식http://127.0.0.1:8088/incWEB/greeting.do
[Servlet 라이프사이클 예]
package ctrl;

import java.io.IOException;
import javax.servlet.ServletConfig;
import javax.servlet.ServletException;
import javax.servlet.annotation.WebServlet;
import javax.servlet.http.HttpServlet;
import javax.servlet.http.HttpServletRequest;
import javax.servlet.http.HttpServletResponse;

@WebServlet("/greeting.do")
public class GreetingServlet extends HttpServlet {
	private static final long serialVersionUID = 1L;

	public void init(ServletConfig config) throws ServletException {
		System.out.println("init");
	}

	public void destroy() {
		System.out.println("destroy");
	}

	protected void doGet(HttpServletRequest request, HttpServletResponse response)
	throws ServletException, IOException {
		System.out.println("doGet");
	}

	protected void doPost(HttpServletRequest request, HttpServletResponse response)
	throws ServletException, IOException {
		System.out.println("doPost");
	}

}

destroy는 세션이 종료될 때(서버가 restart되는 경우) 자동으로 호출된다.
따라서 여기에 리소스 해제 등의 기능을 넣을 수 있다.

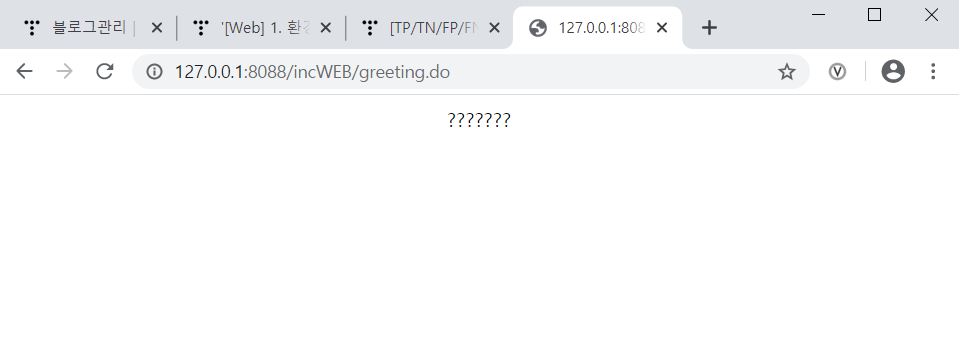
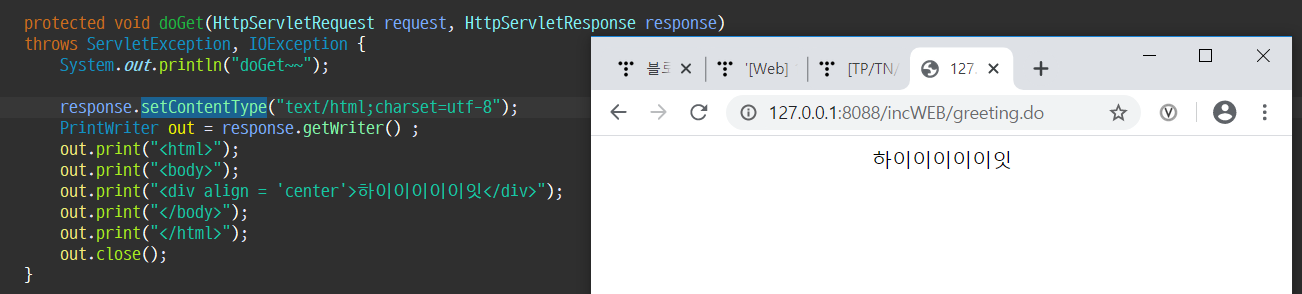
서블릿에 Html를 작성하는 것은 무의미하다.
- Servlet과 JSP의 역할
***따라서 Servlet은 Controller, JSP는 View의 역할***
(1) sendRedirect으로 리다이렉션
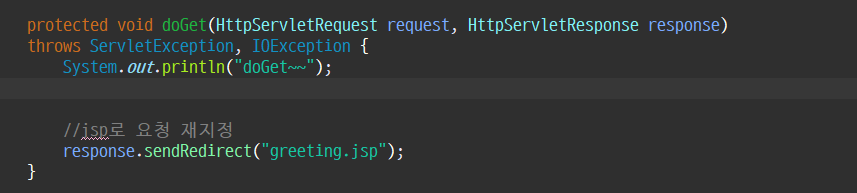
http://127.0.0.1:8088/incWEB/greeting.do로 접속하지만,
http://127.0.0.1:8088/incWEB/greeting.jsp로 리다이렉트 된다.
(url 자체가 변경)
servlet이 jsp에게 view를 넘긴다.
(2) forward를 사용한 리다이렉션

http://127.0.0.1:8088/incWEB/greeting.do로 접속,
http://127.0.0.1:8088/incWEB/greeting.jsp로 리다이렉트 된다.
(url 자체가 변경되지 않음 .do로 고정이지만 화면은 jsp파일내용)
우리는 Forward를 이용해 리다이렉션할 것이다.
'웹 프로그래밍 > Web' 카테고리의 다른 글
| [Web] 6. MVC 패턴(5) - 데이터를 심기 위한 session (0) | 2020.01.31 |
|---|---|
| [Web] 5. MVC 패턴(4) - DB연동 (0) | 2020.01.30 |
| [Web] 4. MVC 패턴(3) - 로그인 과정을 통해 알아보는 DAO까지의 흐름 (0) | 2020.01.30 |
| [Web] 3. MVC 패턴(2) - Main과 Param 동작방식 (0) | 2020.01.30 |
| [Web] 2. MVC 패턴 - Controller와 View (0) | 2020.01.30 |


